

How to Maintain a Cold Food Counter (The Right Way)

Last month, we spoke about hot food counter maintenance & all of the intricacies needed to keep yours running efficiently & reliably. Let’s shift temperatures a bit & dive right into cold food counters. This time things get slightly more complicated, but nothing you won’t be able to handle. Let’s begin the guide.
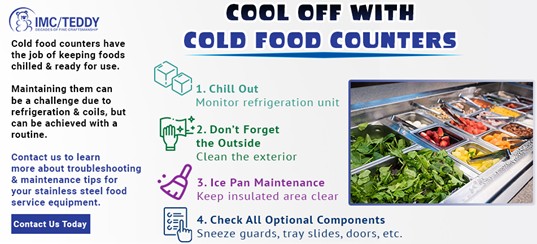
1. Chill Out
There are just some foods that belong in a cold food counter such as salads, certain pastas & desserts (such as gelato). The ultimate challenge with any cold food counter is to maintain that frosty temperature needed for food items to stay fresh. The common rule is to keep cold food chilled at 41°F or below. How is this achieved?
Most cold food counters are equipped with some type of refrigeration unit with a compressor & copper coils. It is vital that these components are running at peak condition at all times. Think of this as the brain of your cold food counter. Without the refrigeration unit, your cold food counter has no use.
Maintenance should include daily testing & removing any dust, dirt or debris from the internal components (such a soft brush or compressed air in removing any small particles). Check for any leaks or loose pieces & have these addressed immediately.
2. Don’t Forget the Outside
Cold food counters are constantly moist & can become streaky after awhile. This is where a consistent cleaning routine will work wonders.
Being that the exterior is made from stainless steel; all the standard cleaning rules apply. Use only soft tools such as microfiber cleaning cloths & non-abrasive cleaners such as baking soda. Wipe with the grain & leave no moisture behind.
Remember to wipe down all optional components such as display cases or tray slides. Undershelves & louvers also need love too. Leave no stone unturned.
3. Ice Pan Maintenance
Contrary to hot food counters, cold food counter generally do not have wells in the traditional sense. Instead, there is one flat insulated area where ice pans can be easily dropped in. Follow these steps to complete the cleaning process:
A. Remove Everything – This means take out all leftover food particles or debris first. Start with a clean slate.
B. Full Cleanse– Wipe down the unit and its surfaces using water, a mild detergent & a warm cloth. For any surface that contacts food, use an antibacterial solution and warm cloth to disinfect the areas. The bottom & edges are where you’re likely to find the most dirt, so make sure you’re regularly rinsing & replacing your cloth if necessary.
C. Dry Off – Leave no moisture behind. A proper wipe down should ensure no water is present.
4. Check All Optional Components
With the basic body taken care of, it’s time to check the other optional parts. The most common is the sneeze guard. To ensure there are no smears or imperfections on the glass, wipe it down with an appropriate glass cleaning product. You can also use white vinegar for a streak-free finish. Buff out with a microfiber cloth as you see fit.
Tray slides should operate smoothly without any stickiness. Check to make sure it is straight when it is put in the upright position. Any compartment doors or latches should also be monitored for any abnormal wear.
Be sure to look for any deterioration of any small parts such as the power cord. Open the counter itself & inspect all internal components for any signs of damage.
Cold food counters are the gateway for delivering chilled treats to your patrons. Having your cold food counter in working order will open up a plethora of food options for your meal service. For our full hot food counter lineup, click here.